[et_pb_section admin_label=”section”][et_pb_row admin_label=”row”][et_pb_column type=”4_4″][et_pb_text admin_label=”Text” background_layout=”light” text_orientation=”left” use_border_color=”off” border_color=”#ffffff” border_style=”solid”]
In a poll conducted by Joe Bunting over at The Write Practice, 72% of respondents said their biggest writing problem is finishing the projects they start.
You’re probably not too surprised by that figure because I’ll bet you have at least one novel sitting around on a hard drive somewhere that you plan to finish “someday.”
But just why is it so hard to finish a book?
I mean, you have a great idea for a story, and you start off full of vim and vigor. Maybe you knock out 1000 words, or 2000 words the first day. You might swoop in for another 1000 the next, and 500 the next.
Soon enough, though, your word count dwindles to nothing. Maybe you have a twinge of guilt at first but, eventually, you just don’t write at all anymore.
Or maybe you do write, occasionally, but you’re not getting anywhere. Writing in fits and starts is leaving you unmotivated and disillusione d.
d.
You chalk it up to life — too many meetings, too much work, too many kids’ activities to attend.
But is that the real reason your novel isn’t getting done? After all, lots of people have busy lives and still manage to write a book or ten.
Maybe you really do have a harder row to hoe than most, but before you give up on your dreams of finishing your novel, you should answer one question: do you have a plan to get there?
If your answer is, “no,” then there is a good chance your lack of planning is what’s holding you back.
While you hear about famous authors like Stephen King “pantsing” their way through stacks of best-selling novels, most of us mere mortals need a roadmap to get from that first blank page to a finished manuscript.
And no one is going to build that map for us.
Luckily, you can put together your own writing plan, and you can do it quickly. If you already have a decent idea about the story you want to write, you can usually develop a blueprint for your novel in less than an hour.
To get you there, we’re going to build a simple novel planner using Trello, a popular and free project management application. More on Trello in a minute, but first …
What Is a Novel Writing Planner?
Before we get too deep into how to construct your novel writing planner, we should level-set on our definition and expectations.
A novel planner is nothing more than a tool that helps you lay out the basic components of the book you intend to write, before you write it, in order to develop a roadmap that will take you from the fuzzy concept to a finished manuscript.
It can be as simple or as elaborate as you want, but for our purposes, the tool needs to meet some minimum requirements. In particular, our novel planner should …
- be flexible enough to accommodate a variety of story structures
- provide a mechanism to (*gasp!*) outline your novel
- allow you to add detailed text descriptions to any part of the plan you develop
- support drilling down from high-level concepts to granular details
- be accessible online, from any device
- have a scheduling component
- be easy to learn and use

- be capable of growing and changing with your needs
- be affordable
- ultimately deliver an actionable roadmap that you can follow to finish your novel
Whew! That’s a heavy burden, but there are several options that are up to the task — with a little elbow grease on your part.
For instance, the Story Planner website checks a lot of these boxes and presents several different templates for you try out. The free version only lets you build one plan at a time, though, and there doesn’t seem to be a way to schedule your work once you’ve set up the plan for your novel.
You could also use free Google products to plan your novel, employing some combination of Calendar, Sheets, and Docs. It’s a very effective approach but can be daunting if you’re not keen on wiring together different applications.
You could also use Scrivener, my favorite all-around writing software and the place I land most often when planning my books. But Scrivener is not free and it’s not available on the web.
And there are any number of other options available for planning your novel, but you really would be hard-pressed to beat the combination that Trello brings to the table.
Let’s dive in …
Getting Started with Trello
If you haven’t heard of Trello, well, it’s high time you did!
Trello is a free onli ne project management application that implements the idea of Kanban.
Originally developed by Toyota, Kanban is a visual productivity system that lays out three basic lists of tasks: To Do, Doing, and Done.
Within each list, work items are represented by cards or sticky notes, which are moved from list to list as work progresses.
It’s a simple scheme that plays on human’s innate preference for visual information, and it’s yielded big benefits for Toyota and others over the years.
Trello brings that idea to the masses through the web, and it’s been used by millions of people over the last five years. Its flexibility and intuitive interface are without peer in the current landscape, and it’s just about the perfect tool for building your novel roadmap.
To get going with Trello, you first need to sign up for a free account by clicking here:

Click “Let’s Go” and fill in your information:

Now, you can create a team name if you want — teams sit at the top of the Trello hierarchy. You can also skip this step and work without a team name. If you’re not sure, just skip forward because you can always add teams later.
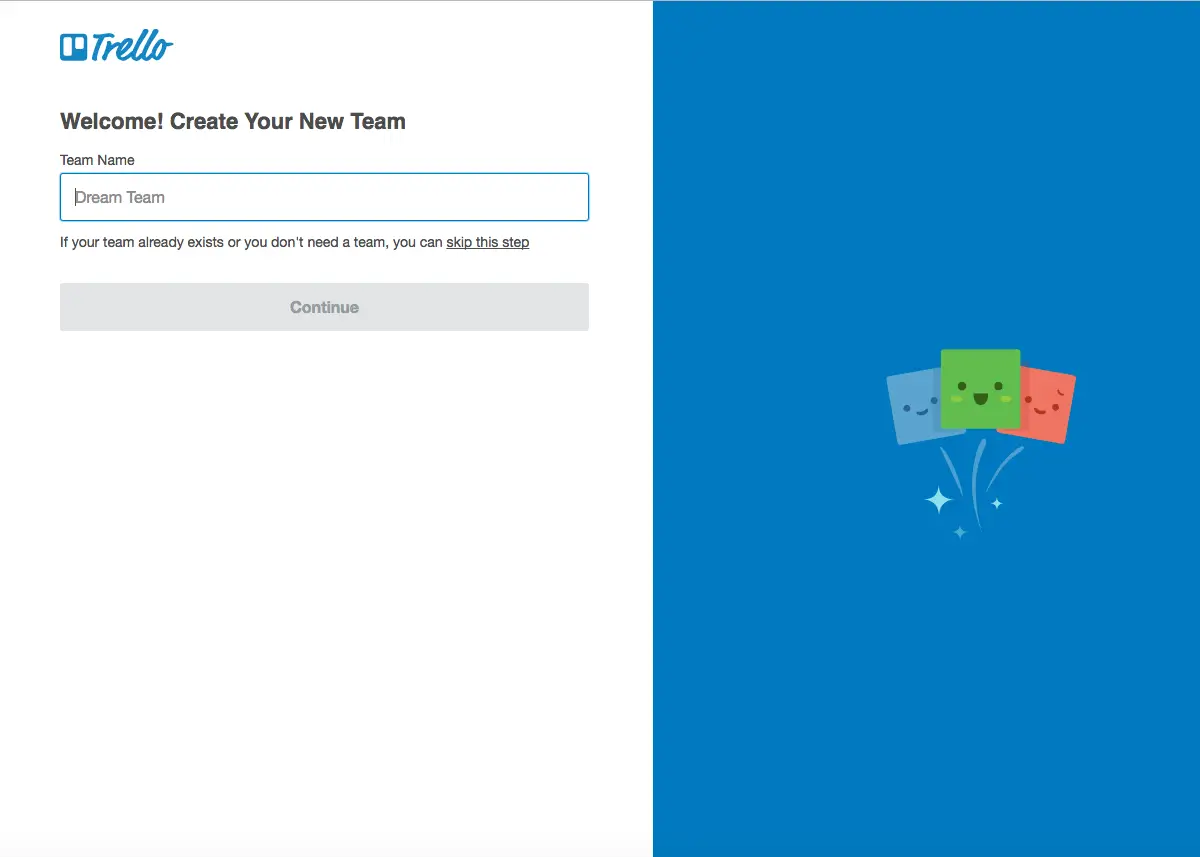
You also need to confirm your email address by clicking a link that Trello sent to you, but for now, you should see something like this:
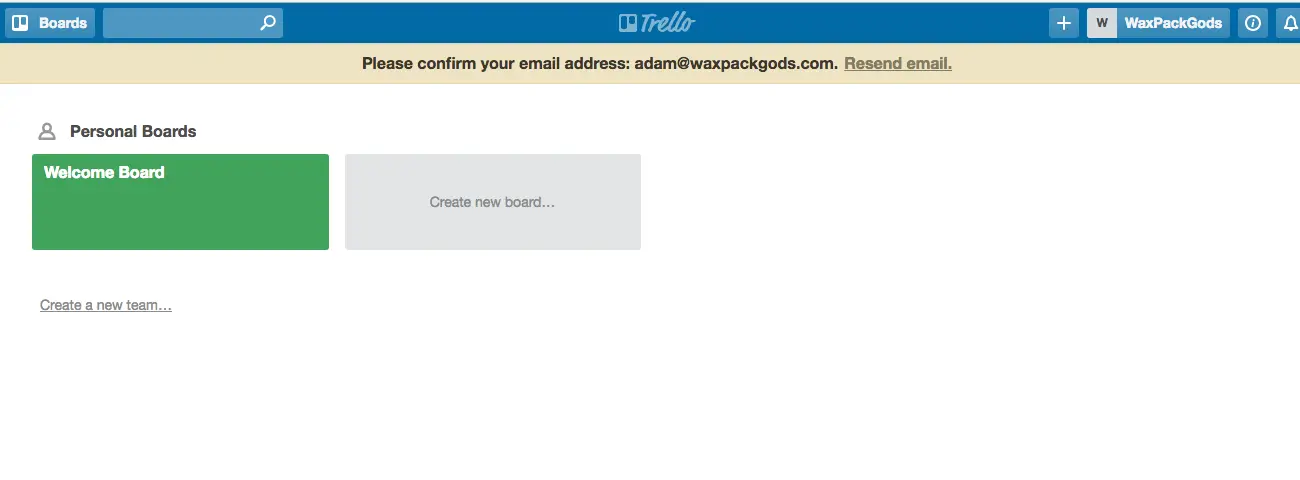
Boards are the next highest level of data organization in Trello, just beneath teams. To see how boards work, either click the “Create new board …” button or click on the Welcome board:
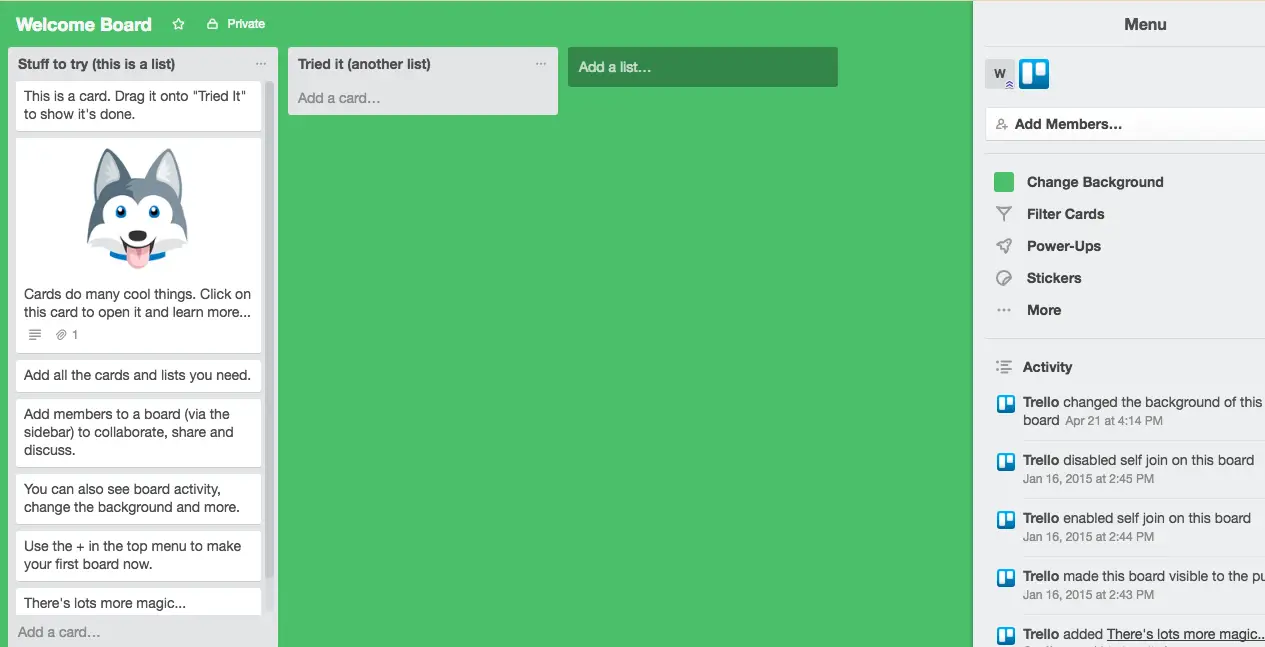
This board has two lists: “Stuff to try (this is a list)” and “Tried it (another list).” The first list has as a series of cards, which are the basic units of work or tracking in Trello. If you click on the card with the dog face, you can read more about how cards work:
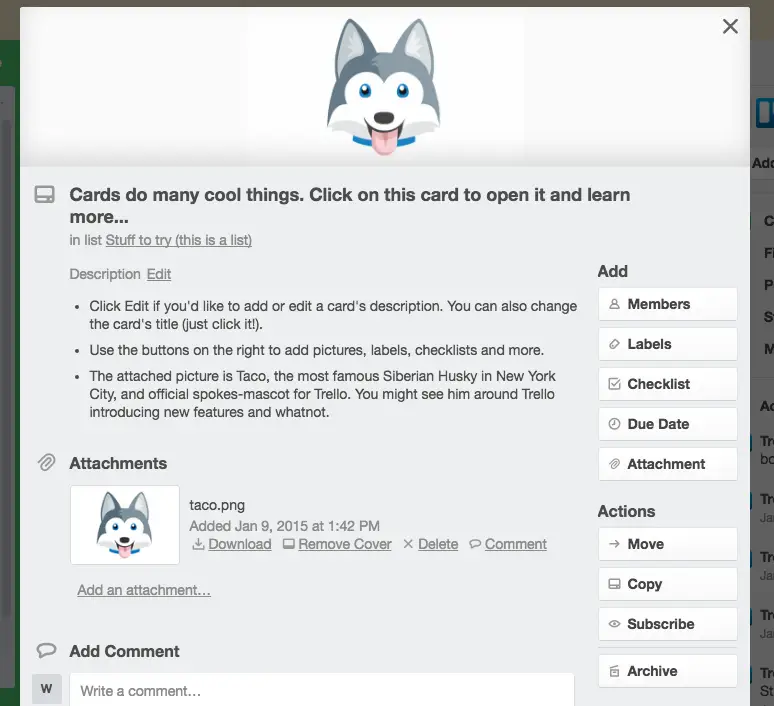
Those are the (very) basics of Trello, but we’ll cover more specific functionality in the next section when we build our novel planner.
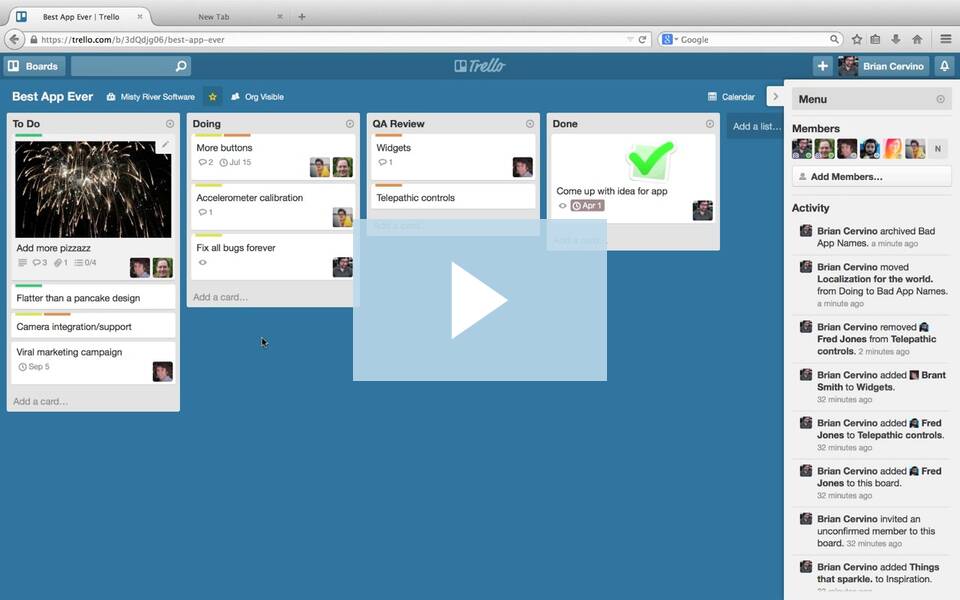
If you’d like to see more of Trello in its glory, you can go to the source and check out this video from Trello:
Getting Started With Trello – help.trello.com
Building a Trello Novel Writing Planner
Now that you’re set up with Trello, it’s time to create your novel planner. For the rest of this article, I’m going to use my own first novel (Alive on Opening Day) as an example for building out a planner.
You can approach your plan in all sorts of different ways, but for this tutorial, we’ll use the 7-point story structure as our guide. If you’re not familiar with this layout, the basic elements are:
- Hook — the initial incident that draws your audience in
- First Plot Point — the inciting incident that is the reason for everything else your protagonist does throughout the book
- Pinch Point 1 — a moment in your story that hints — or spells out — the challenges that drive your characters; it forces your protagonist’s hand and drives him toward the mid-point
- Mid-Point — the point when your protagonist takes control of his fate
- Pinch Point 2 — something else happens to reinforce your main character’s resolve — often something unpleasant
- Second Plot Point — you protagonist figures out what he has to do and drives forward toward resolution
- Resolution — the wrap-up, where you tie together all the loose ends of your story
Check out J.R. Hall’s excellent series of posts starting here for a much more thorough explanation.
Now, to get started building your 7-point novel planner, log in to Trello and create a new Board. I suggest just calling it the title of your book (you can change the board name later):

Your new board should look something like this:
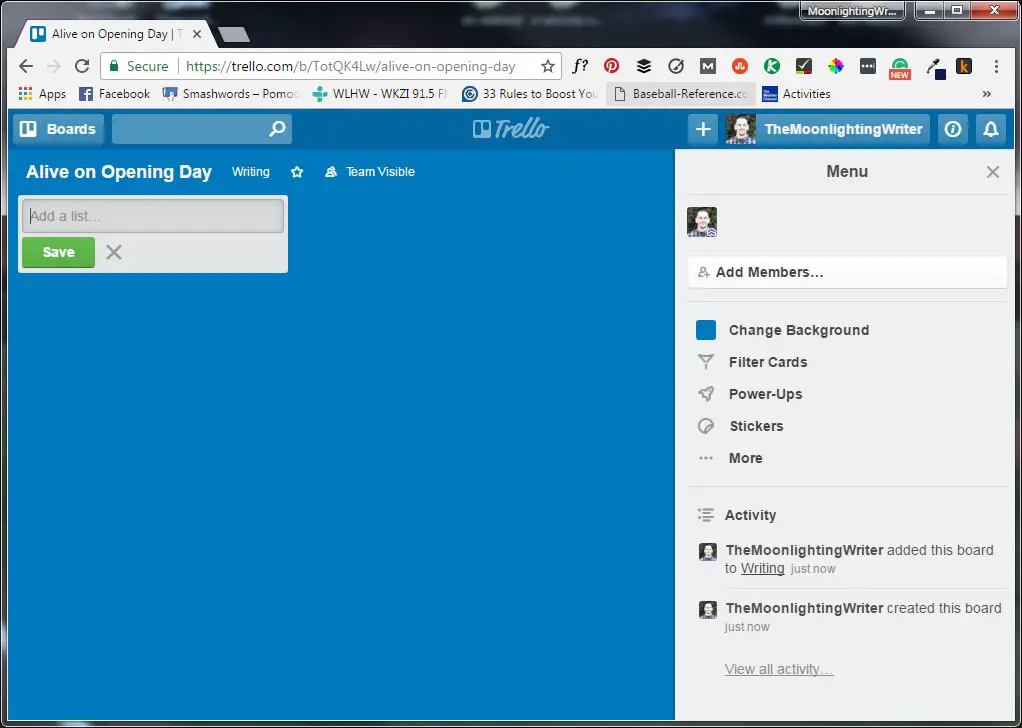
Next, create a list where you can do your novel planning by clicking “Add a list …”,typing in your list name, and clicking “Save.” I called my list “Plot Structure”:

Now, click “Add a card …” and type in “Hook” to add a card for your story hook to your new list. Repeat for each of the other six parts of the seven-part story structure:
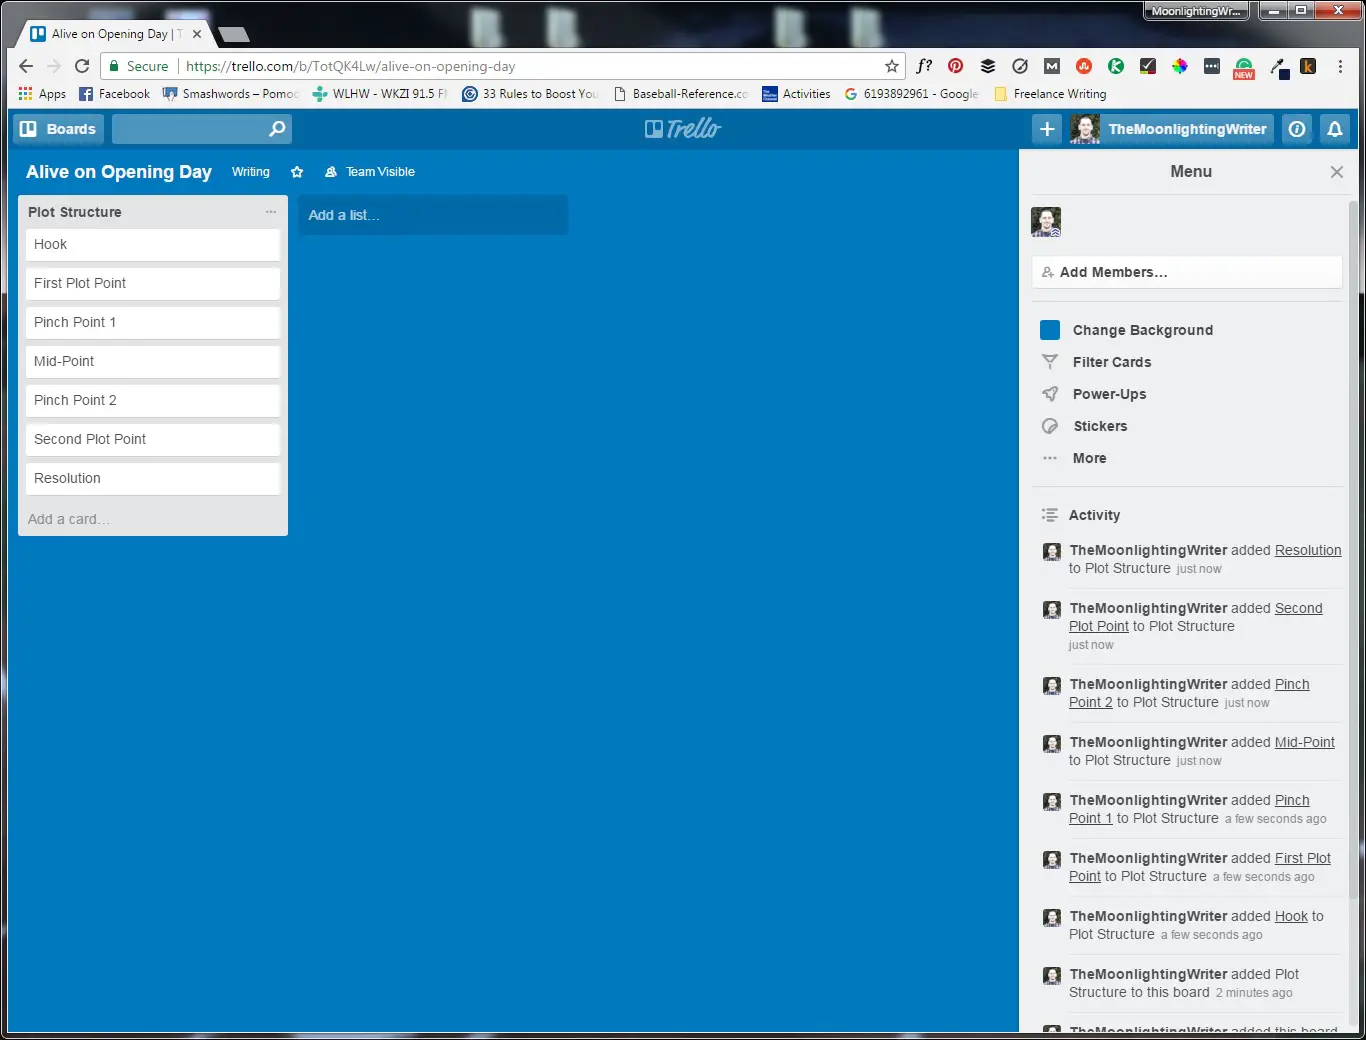
At this point, you have an empty shell into which you can scoop the pieces of your novel. To get started fleshing it out, click on the Hook card to bring up a dialog box. This is the “back” of the card in Trello parlance:
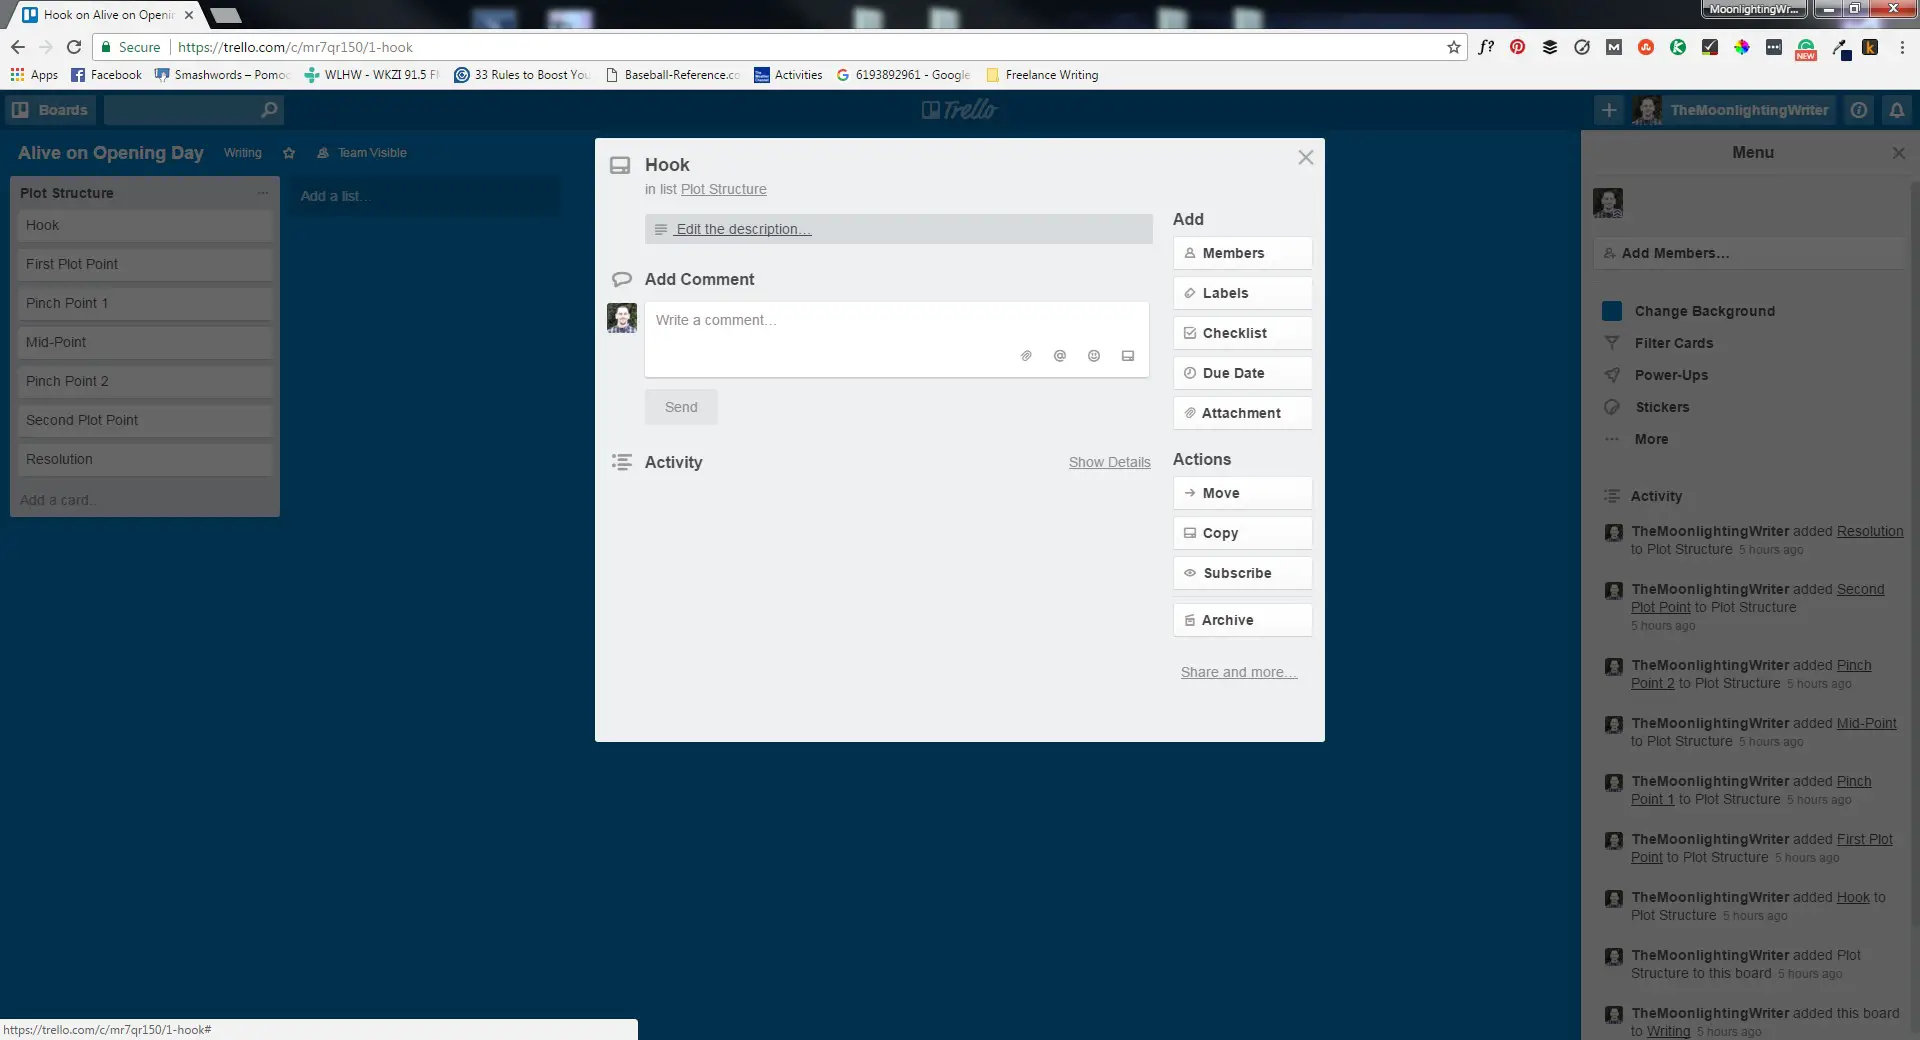
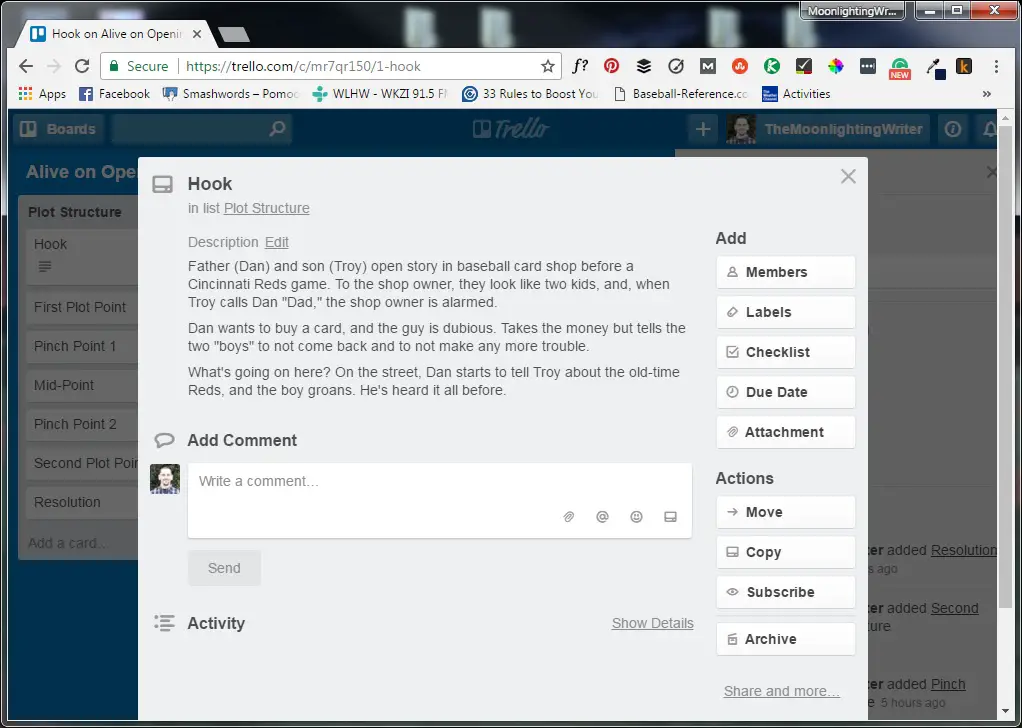
Your job now is simple — think about the very beginning of your story and how you plan to drag the reader into your world. Will you reveal something mysterious about your protagonist? Will he do something shocking? Will a catastrophic event change his life before we even get to know him? When you have the basic idea for you hook, jot it down in the card description area, adding in as much or as little detail as you like. I usually do this in 2-3 sentences:
Repeat this brainstorming process for the First Plot Point — what is the event that moves your character forward, the reason for the rest of your book? Write that down in a few lines:
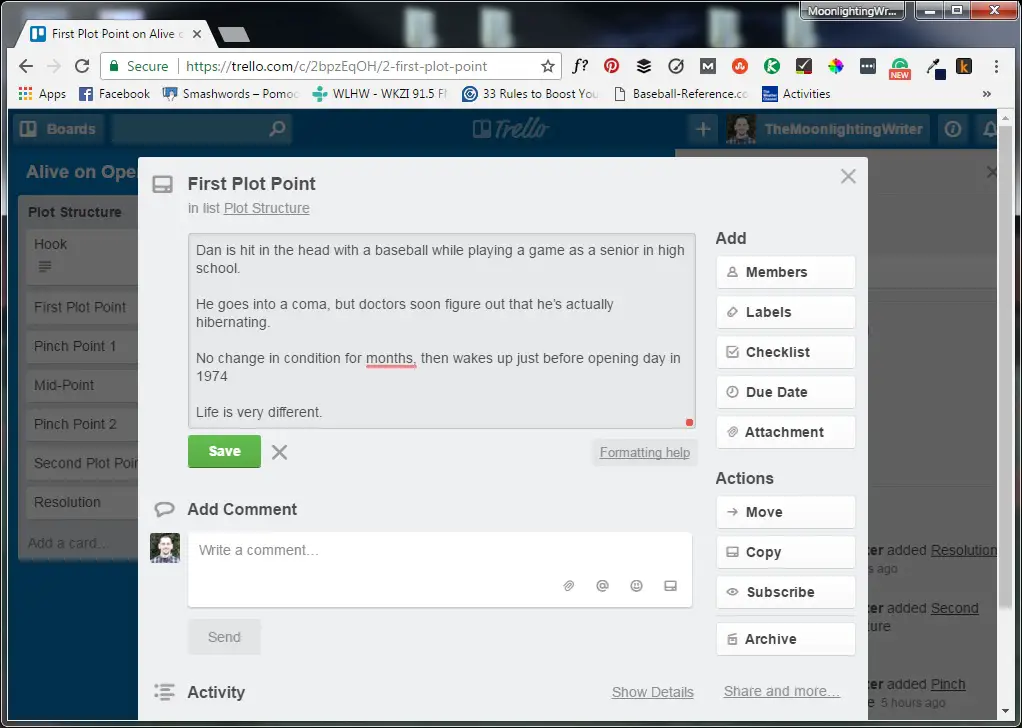
Take a few minutes and write out a synopsis for each of the basic plot points. Don’t worry if you aren’t clear about where you want to go with some of them. You’ll have plenty of time to change them later on, and murkier elements usually become more solid once you start hammering out your ideas on these cards. Sometimes it helps me to start with the high points — hook, mid-point, resolution — and then filling in the rest with the events that must happen to move your story from one milepost to another.
Got your basic ideas committed to “paper”?
Great!
Now it’s time to get more specific — remember, the ultimate goal is to have a roadmap that will lead you to your finished novel, and what we have so far is a bit vague for that.
To start adding meat, go back to one of your cards, click on it, and add a checklist called Chapters. I’ll illustrate with my first plot point since it has more to work with than my hook does:
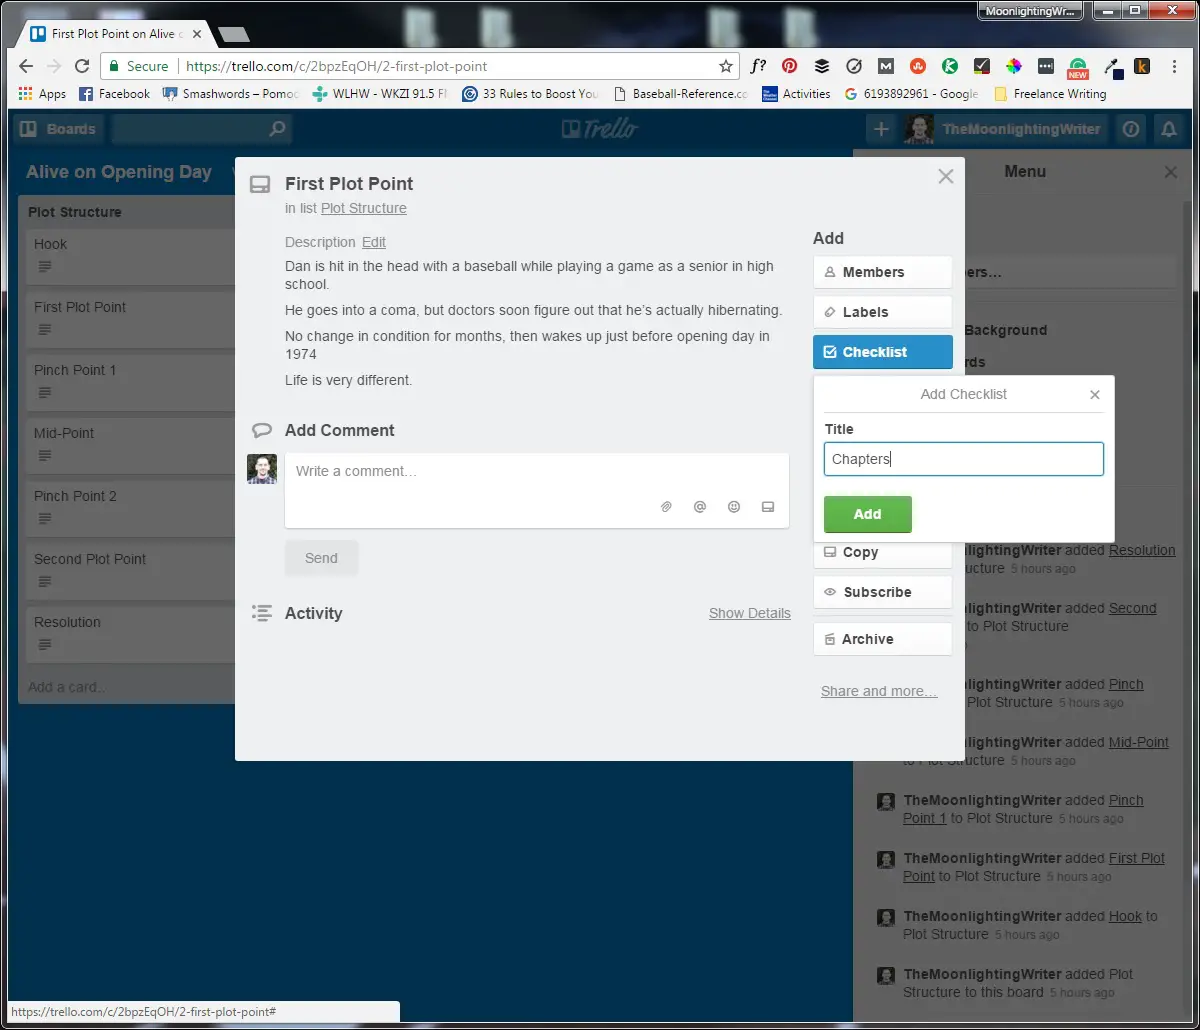
Read through your synopsis on the card and think about what scenes and dialogs you need to write in order to make that overview come “true” in the context of your book.
How are those scenes related?
How would you form them into chapters?
Again, this is a game of estimation, and you’ll likely make adjustments as you move along in the process of planning and writing your novel. For now, make a best guess as to how your chapters might break down to pull off this particular plot part. Here is where I ended up with for Alive on Opening Day:

Do this for each of your story parts, and you’ll have a pretty good outline of your novel that probably won’t take much more than a few minutes to make — certainly no more than half an hour.
We could stop here, and you certainly can. This list of chapter titles will get you moving better than trying to pants your way through a story.
But it’s not quite deep enough for my taste.
Instead, I like to break out each bullet point — each chapter title, that is — into a separate Trello card. One way to do this is to use the “Convert to Card” functionality underneath each checklist item, as shown below.
But don’t actually do this yet!
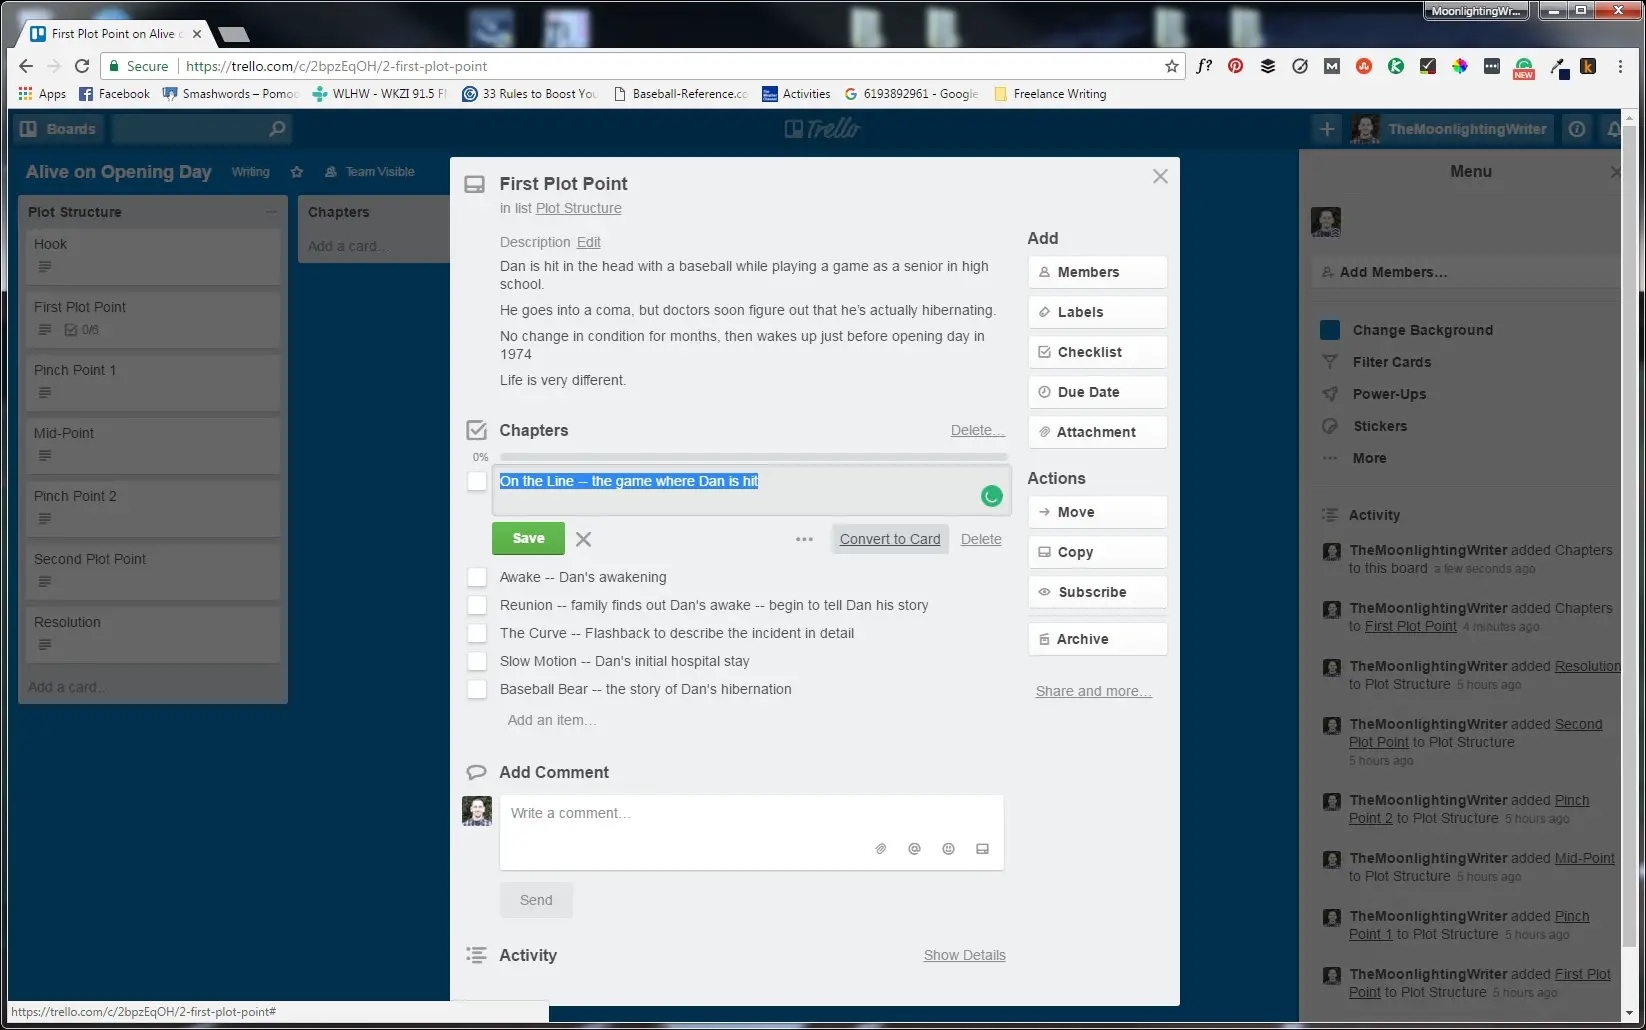
If you use this feature of Trello, your chapter will get its own card, but it will also disappear from your checklist. I’m pretty uptight and like to keep history and backups of everything I do, so I usually just cEW cards corresponding to the chapter titles, like so:
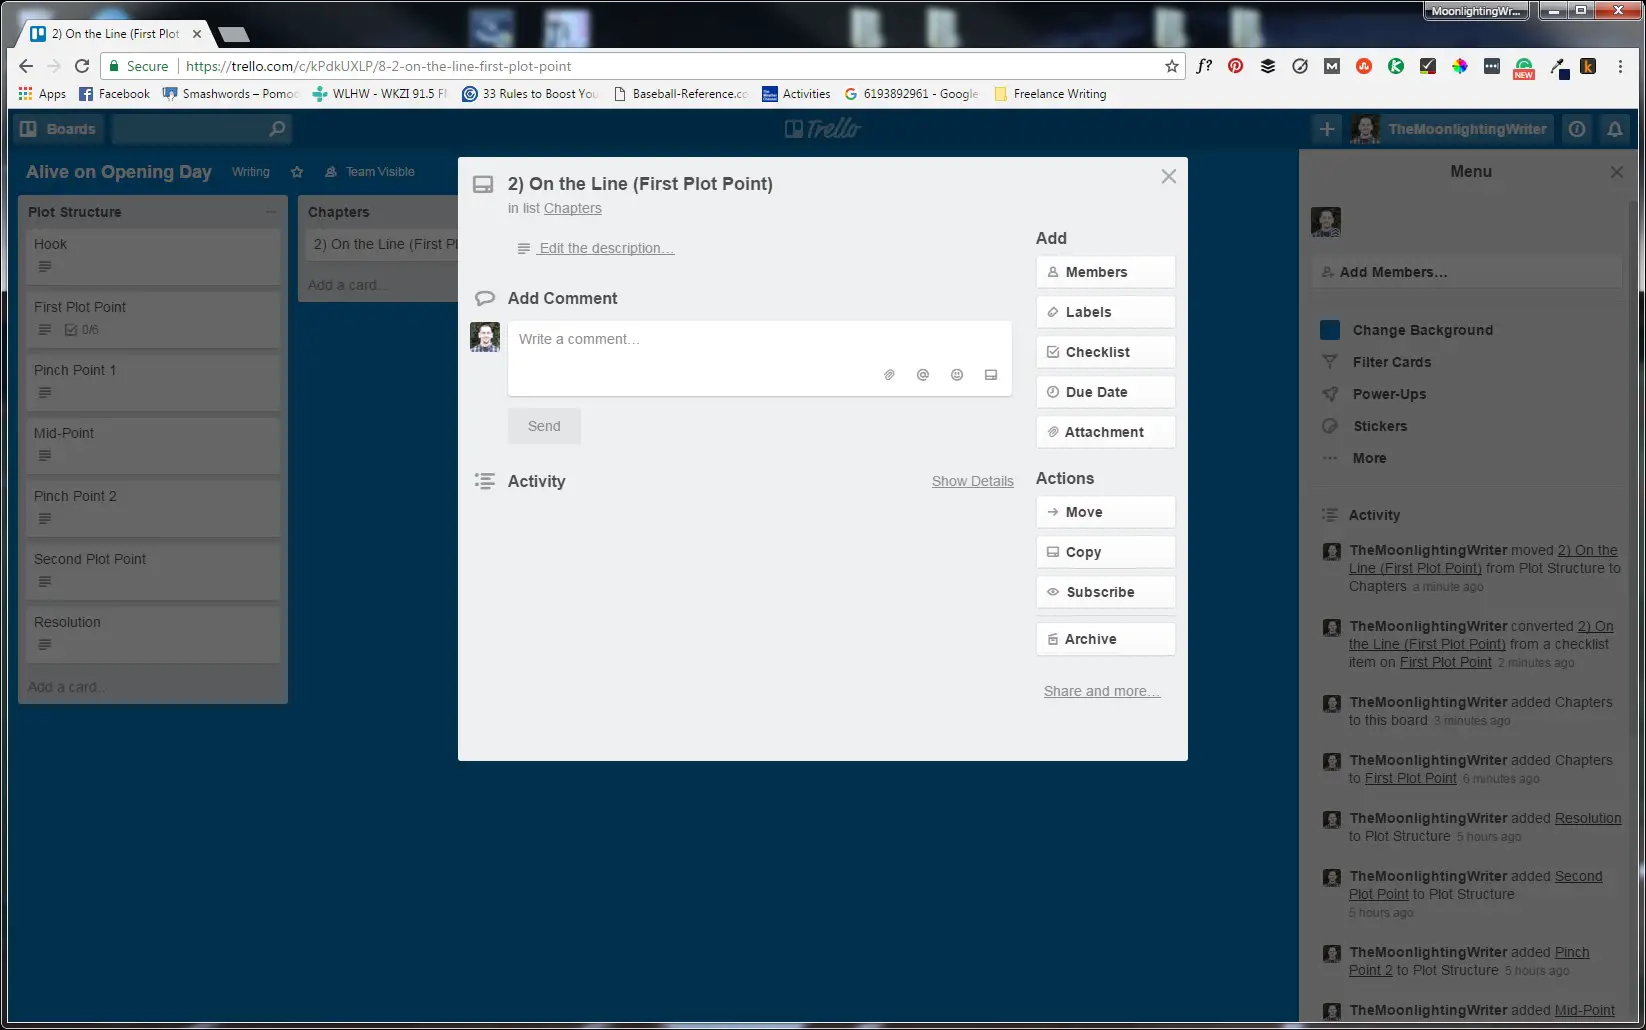
If you look in the background of that image, you can see that I also created a new list called “Chapters.” That’s where my chapter cards will “live,” at least to start.
You may also have noticed that I gave each card a number — corresponding to the chapter number — and a note specifying which part it belongs to (“First Plot Point”).
These are more or less personal style points, and you can take them or leave them.
In fact, I often omit the chapter number because I usually end up re-ordering them as I work through my planner. Trello makes that easy — just drag and drop to the new location.
You can also use Trello labels to group cards together.
Just click on a card and then on the “Labels” button.
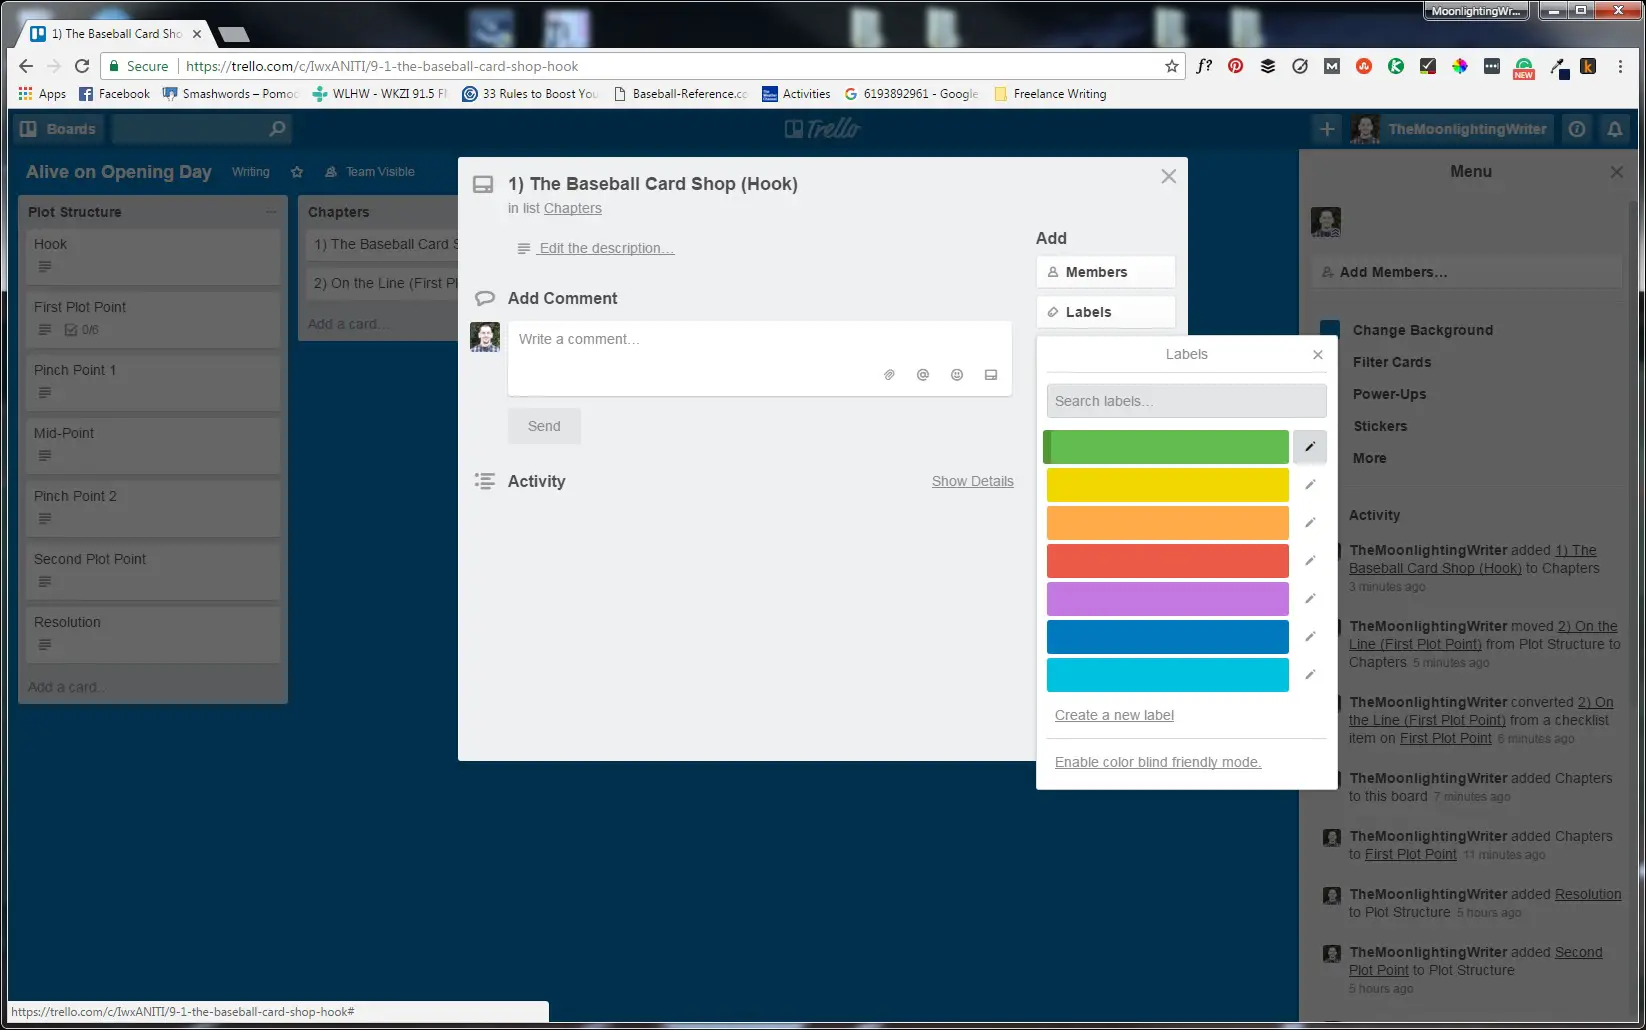
From there, click on the pencil icon next to one of the colors and then enter a label title, like “Hook”:
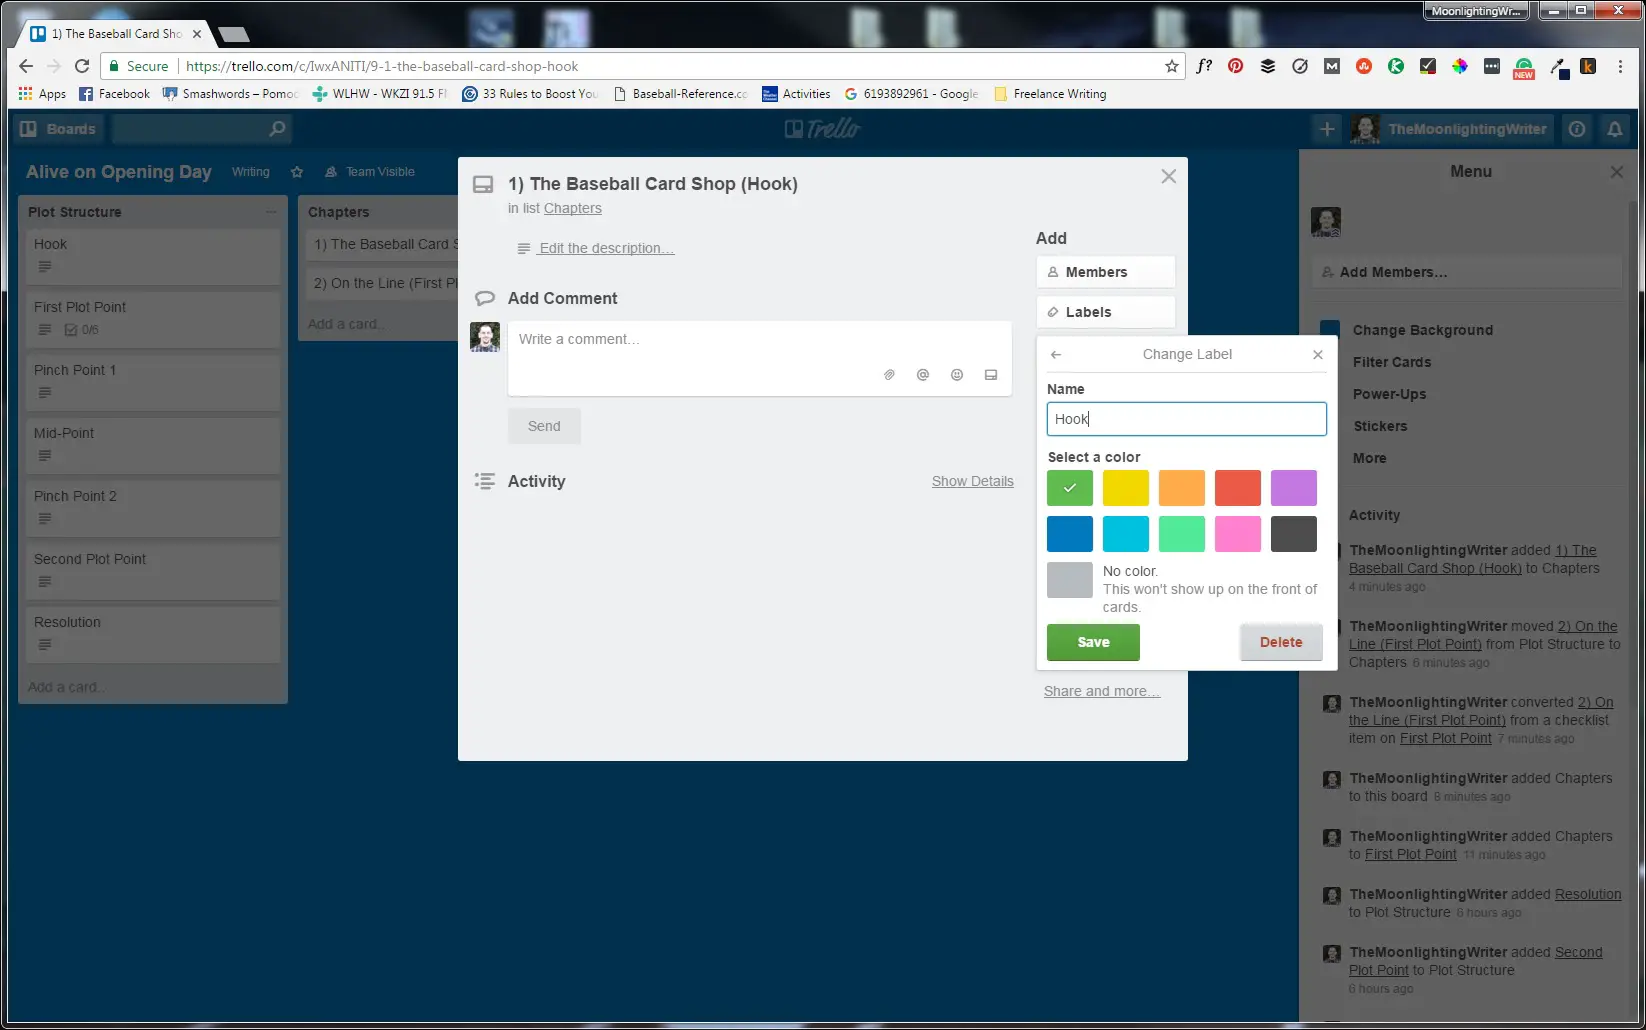
Save your changes and then add text for the other labels you plan to use:
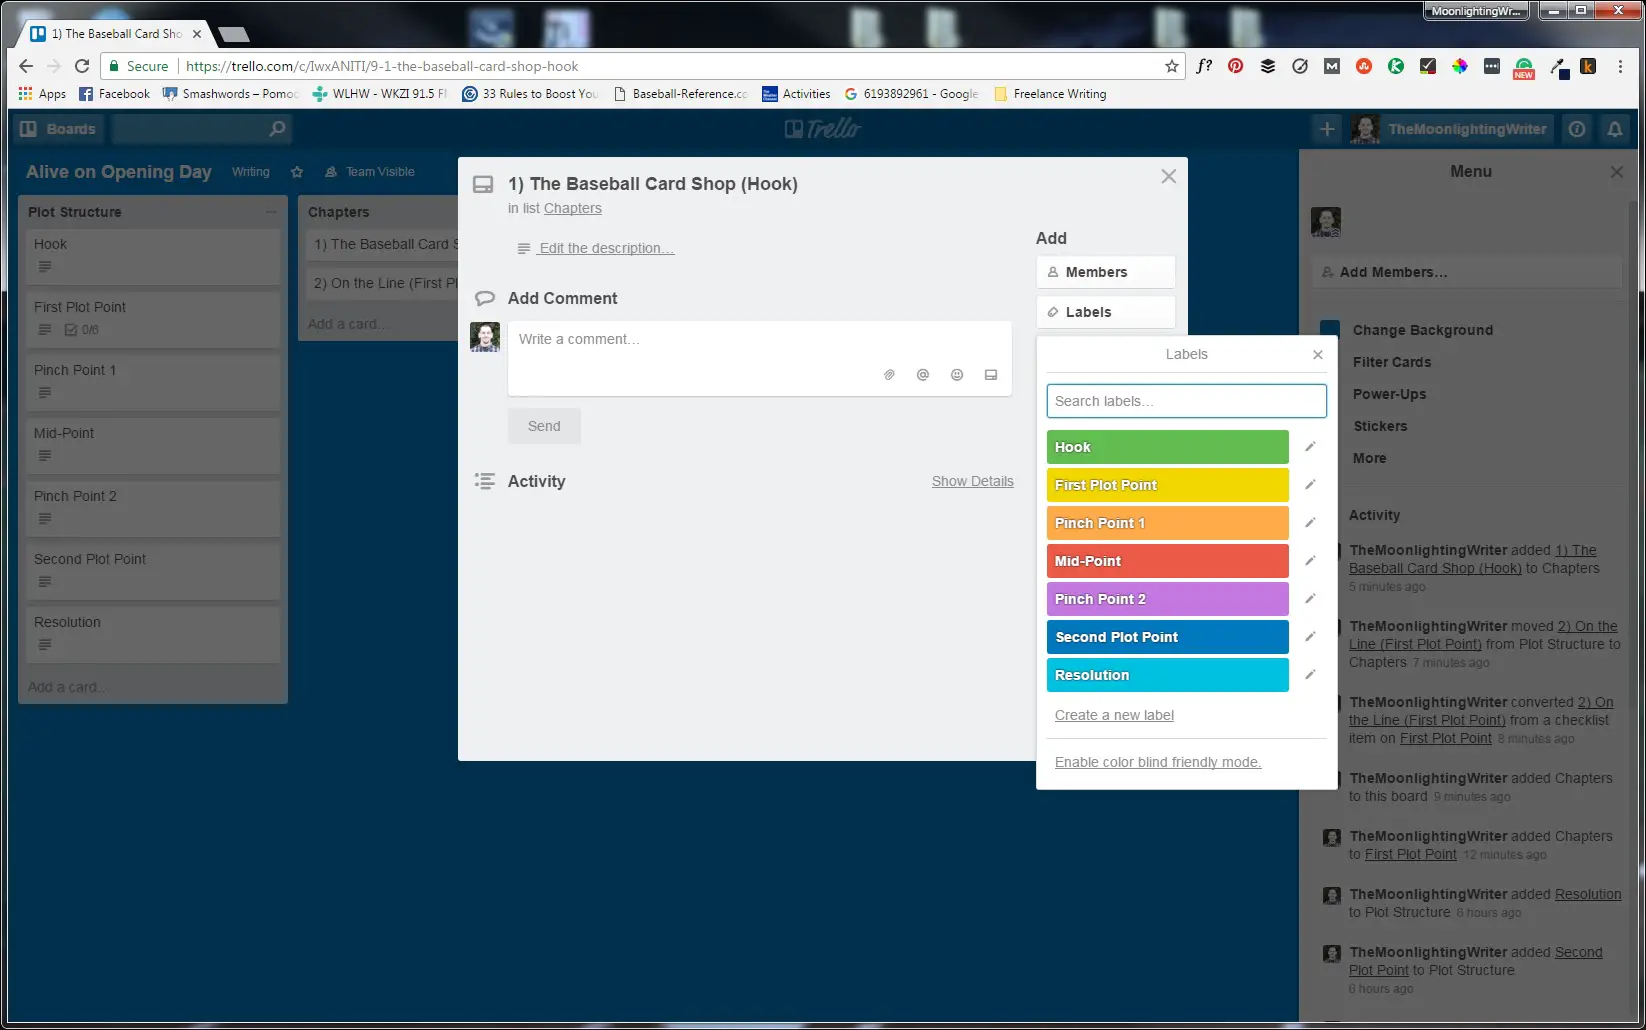
Finally, click the label that you want to place on your chapter card:

When you close the card, you’ll see the label, too, giving you a quick way to visually group your cards (and chapters):

Now, open up one of your cards so we can add in the secret sauce that will make writing your chapter a (relative) breeze later on.
Specifically, you’re going to write another synopsis, this one a detailed overview of your chapter. This is the last step of your drill-down, and it should be the most thorough. The idea is that, when you come back to each chapter, later on, to actually write it, your card will contain enough information to allow you to just sit down and crank out your first draft.
My chapter synopses usually run anywhere from 50 to a few hundred words. Here’s an example from Alive on Opening Day:
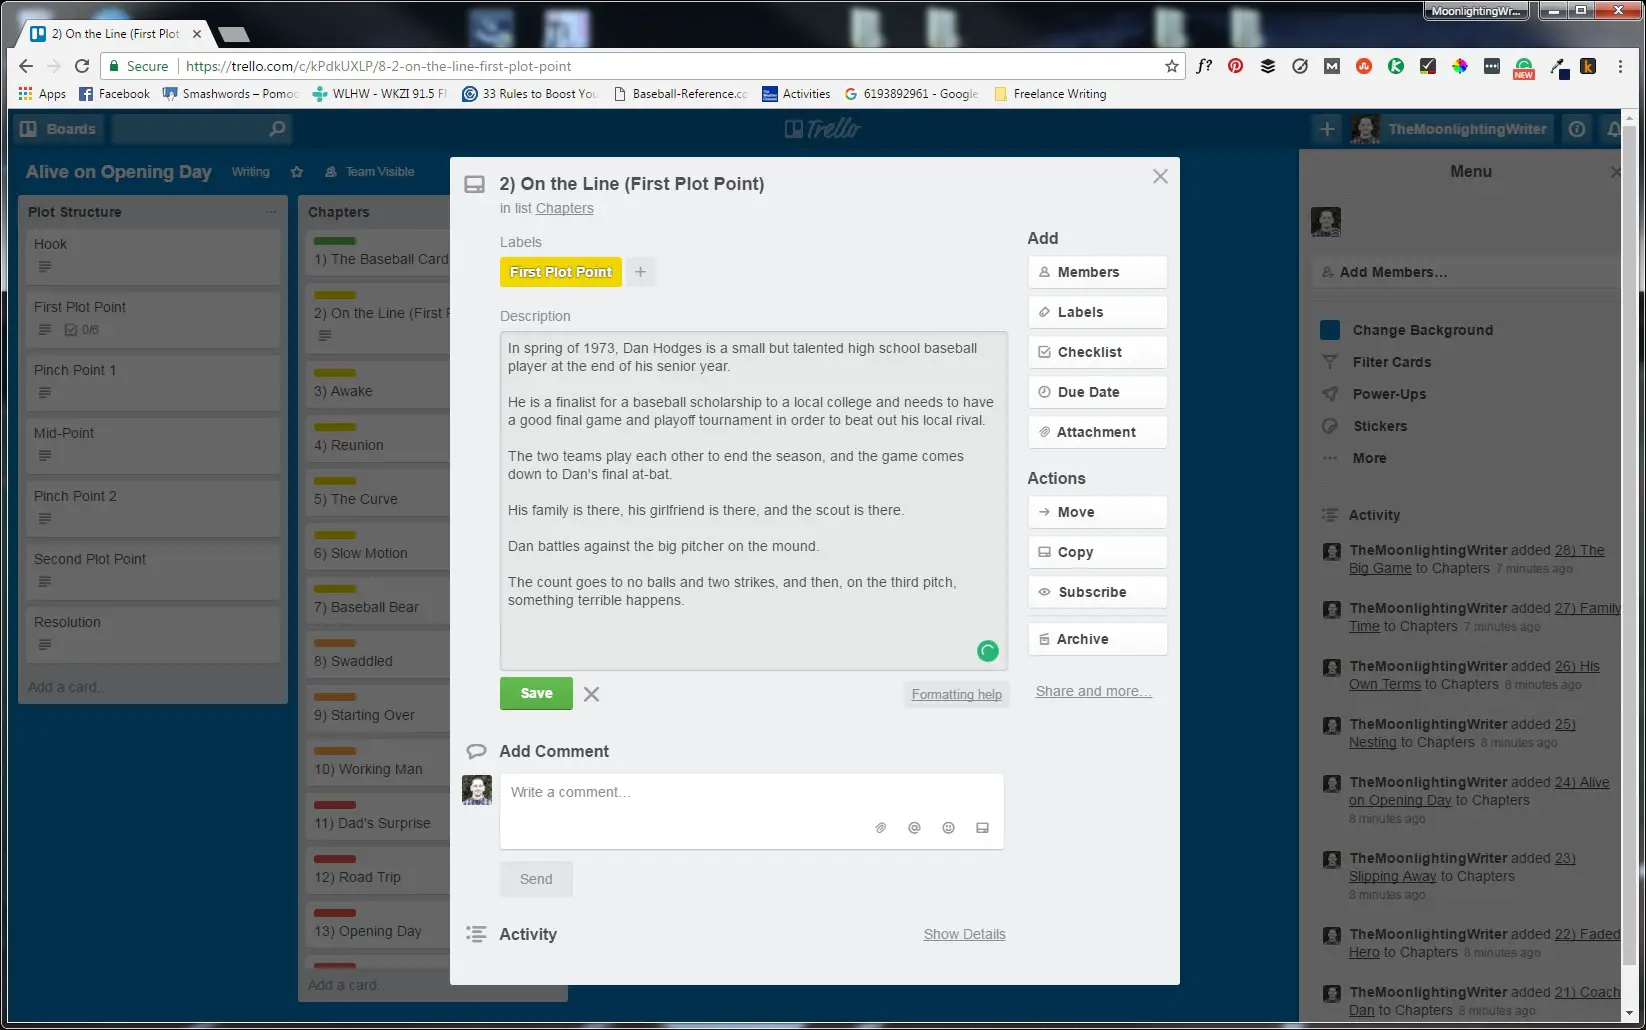
Do this for each of your chapters, and you’ll be ready to write your novel. Heck, you don’t even have to write your chapters in order — the next time you have a chance to write, just grab one of your cards and go to town!
Scheduling Your Writing
Of course, planning your novel doesn’t really stop with laying out your chapters, and you can’t count on finding the time to write.
In my experience, the best way to ensure you get your writing done is to schedule it just like you would any other commitment.
Trello can help you with this, too.
First, you’re going to add three more lists to your novel board: In Progress, Ready to Edit, and Done:
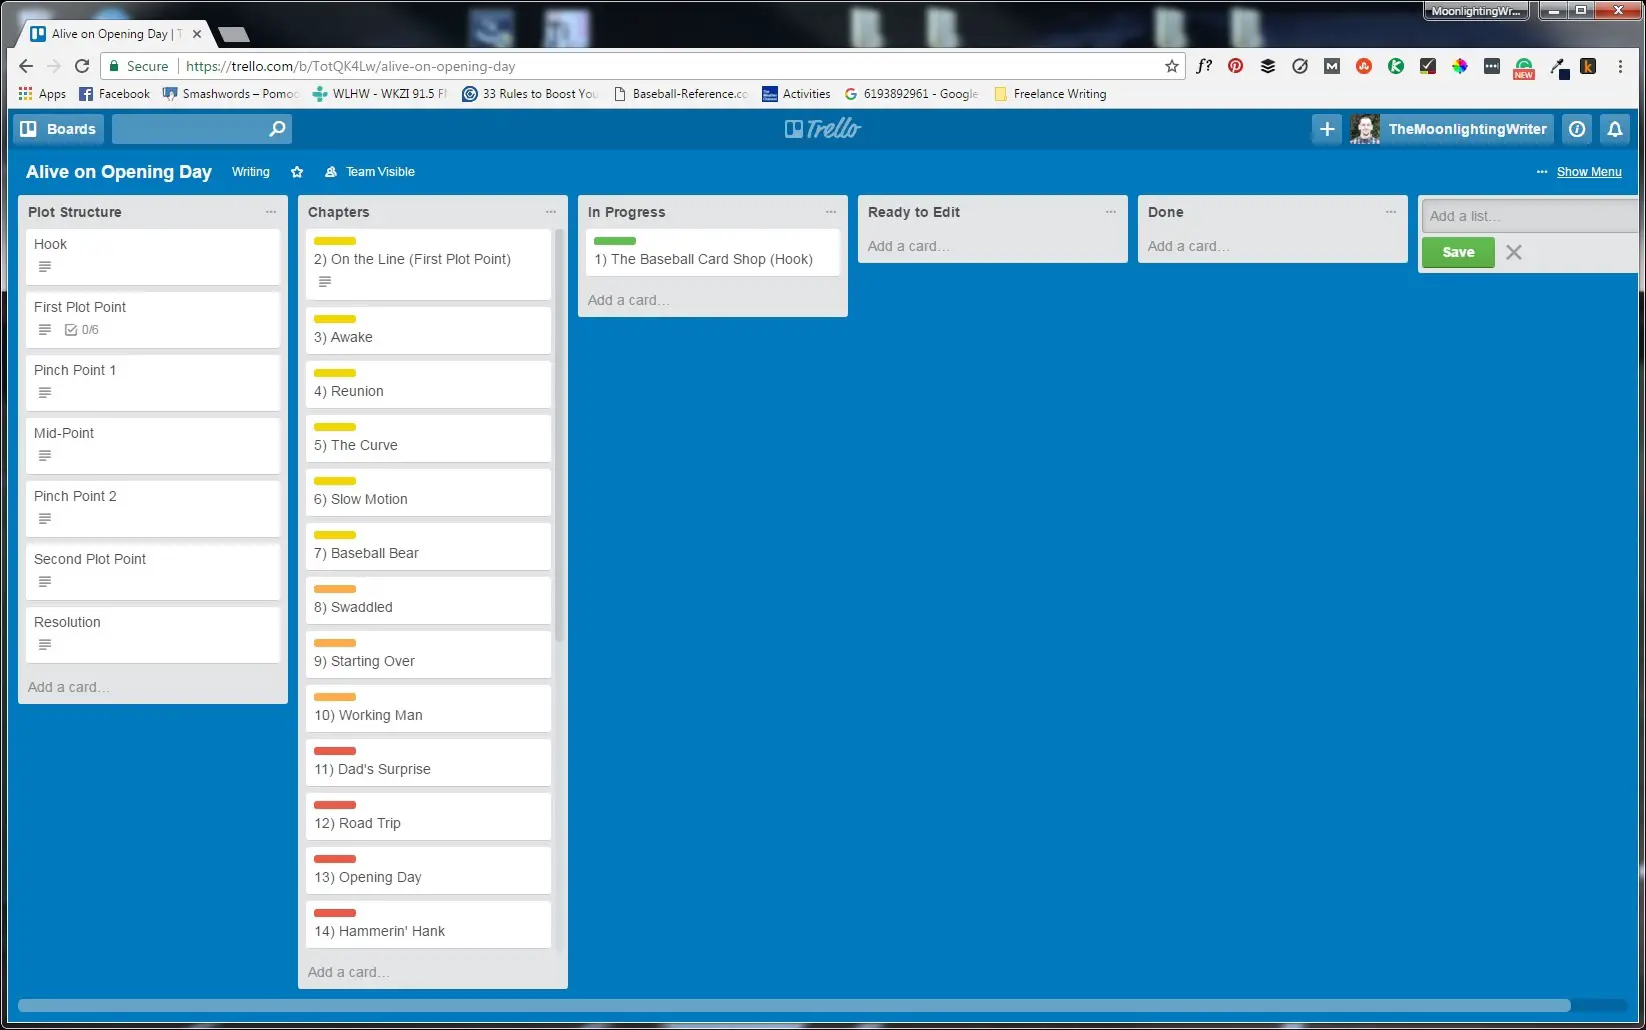
Now, when you’re ready to start writing a chapter, just drag its card from the Chapters list to the In Progress list and start writing.
Pretty nifty, right?
But it gets better.
Open one of your cards again and click on the Due Date button:
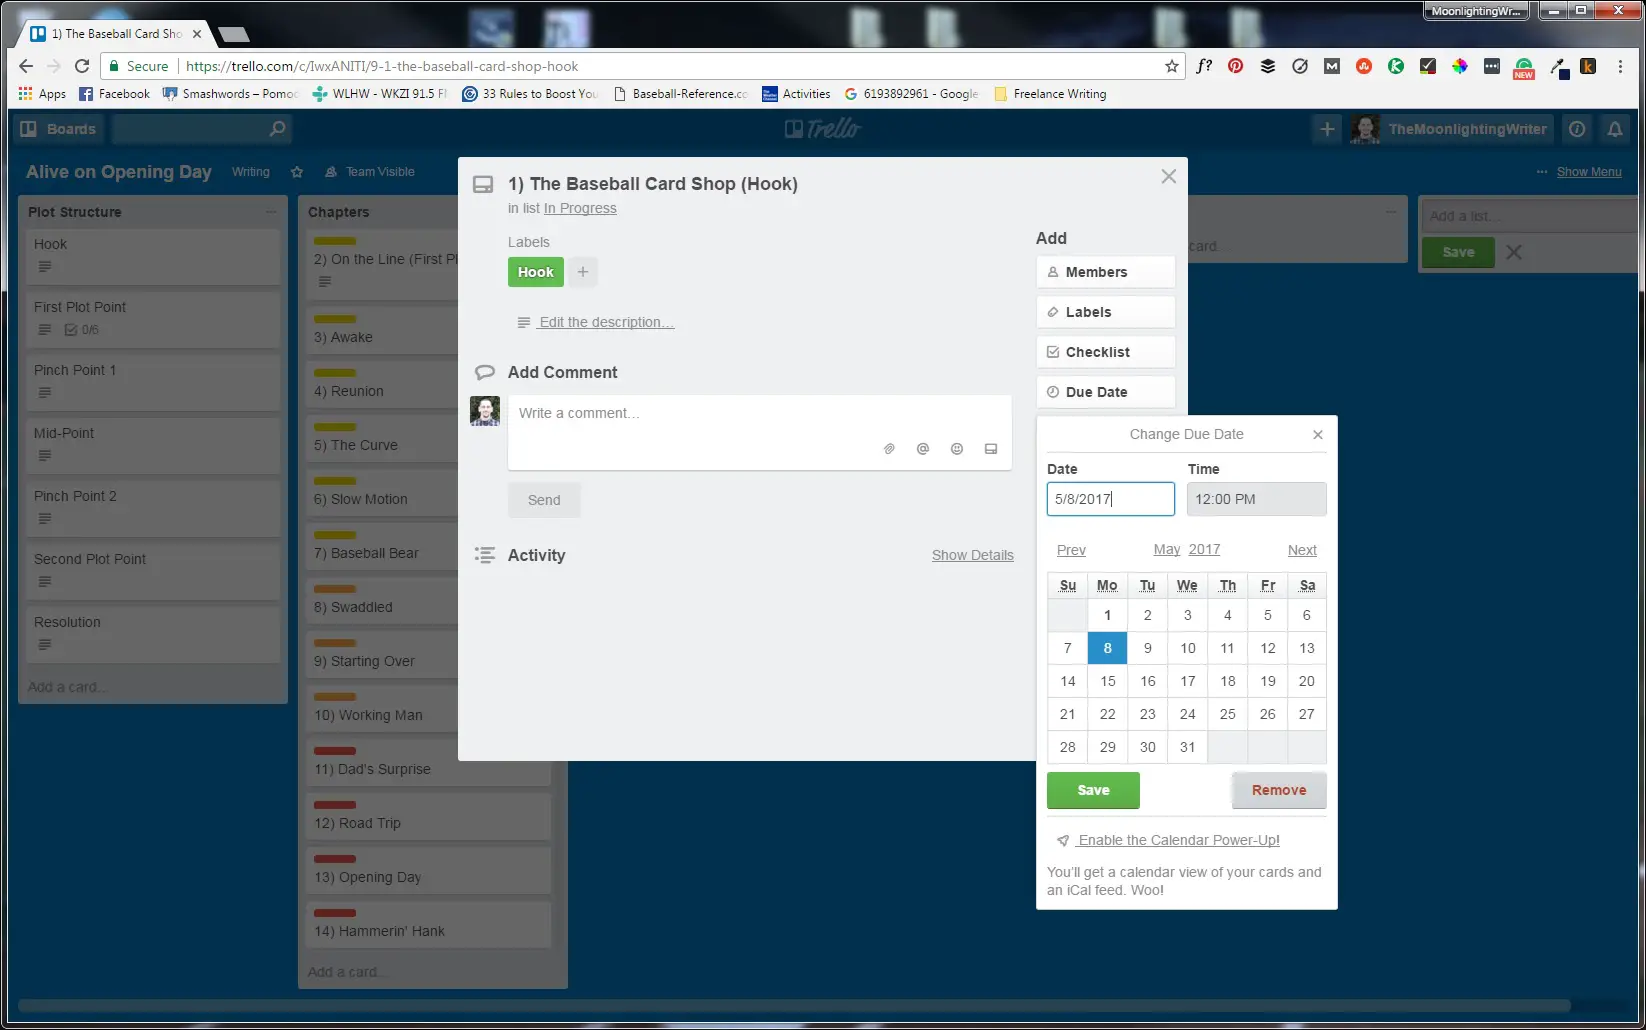
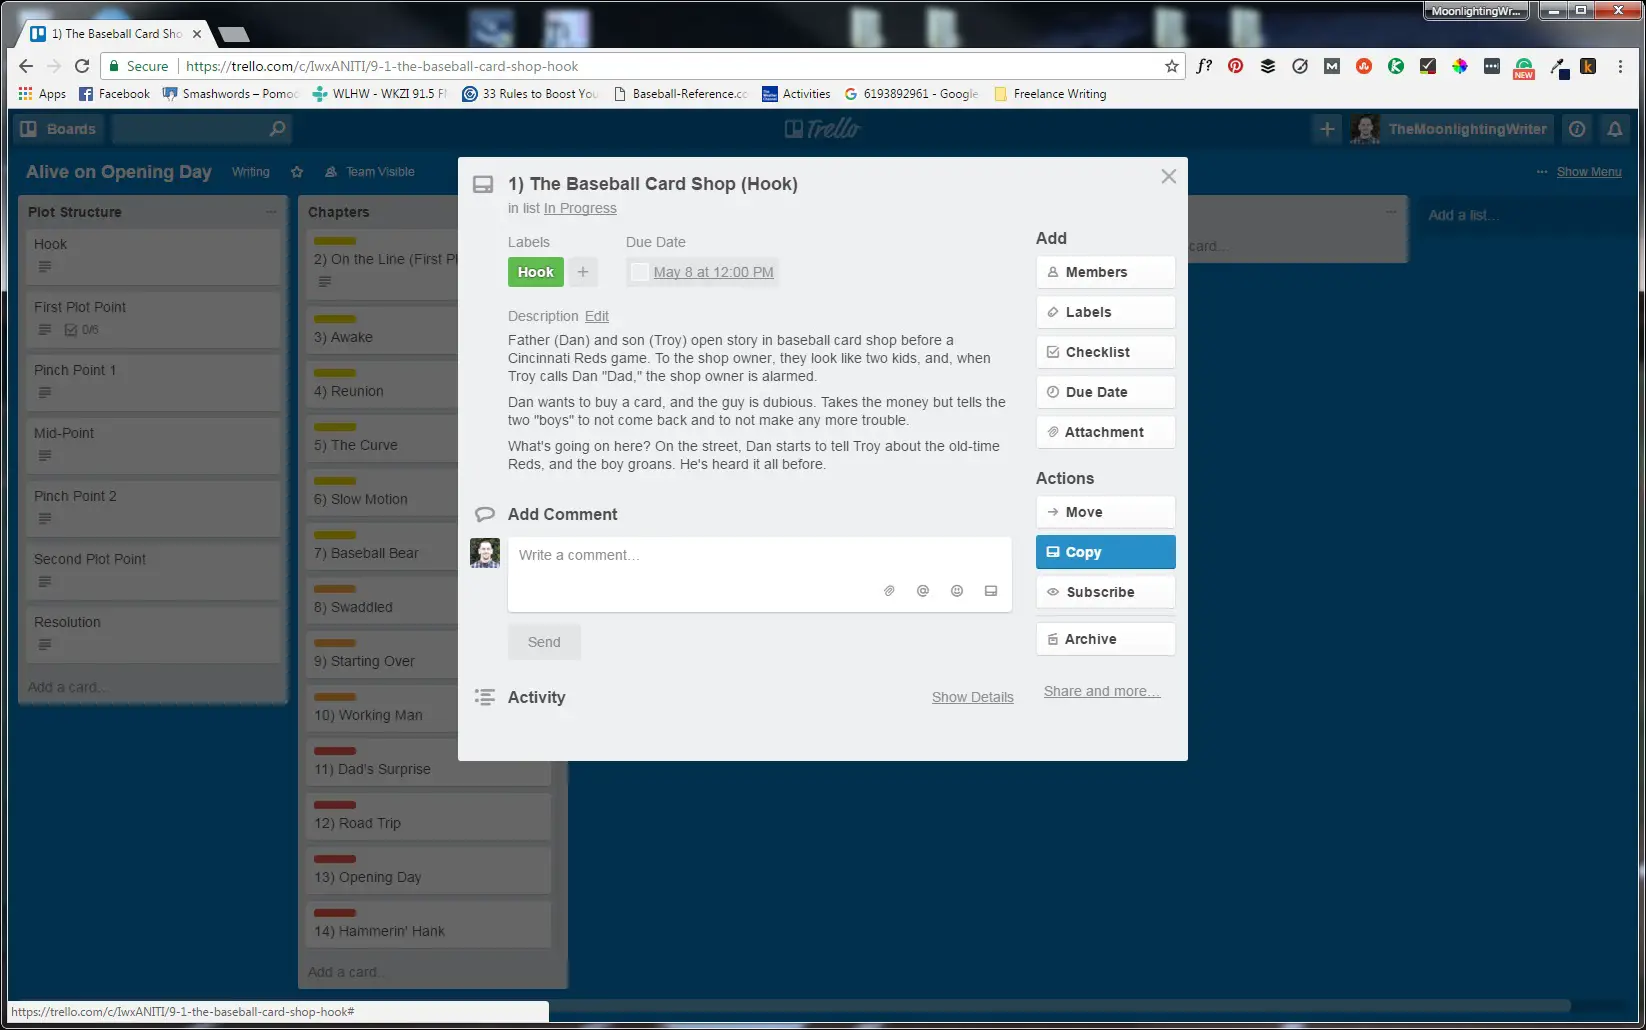
Select the date that you want to finish your chapter, and it shows up under the “Due Date” tag above the card description:
When you close the card, the due date displays next to a little clock icon on the card front:
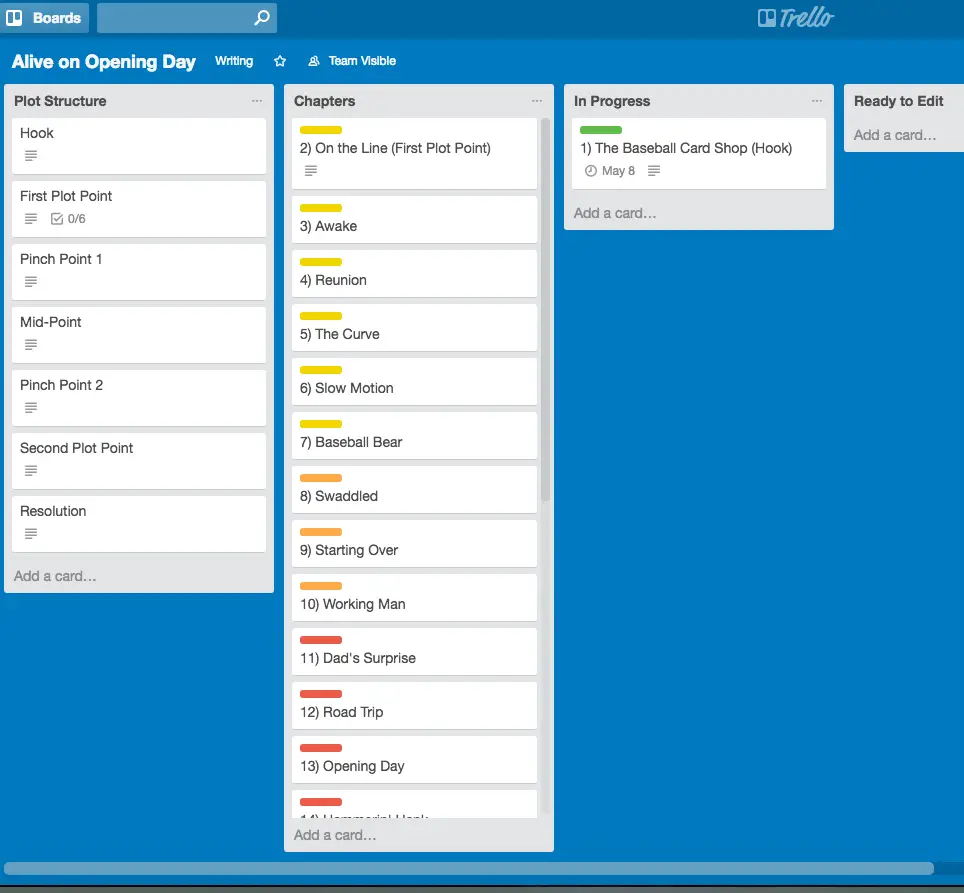
Assign due dates to all your chapters, and you’ll always know at a glance what you need to be working on today … and tomorrow … and the next day.
Not only that, but Trello will send you email reminders about which chapters (cards) are due soon or, heaven forbid, overdue.
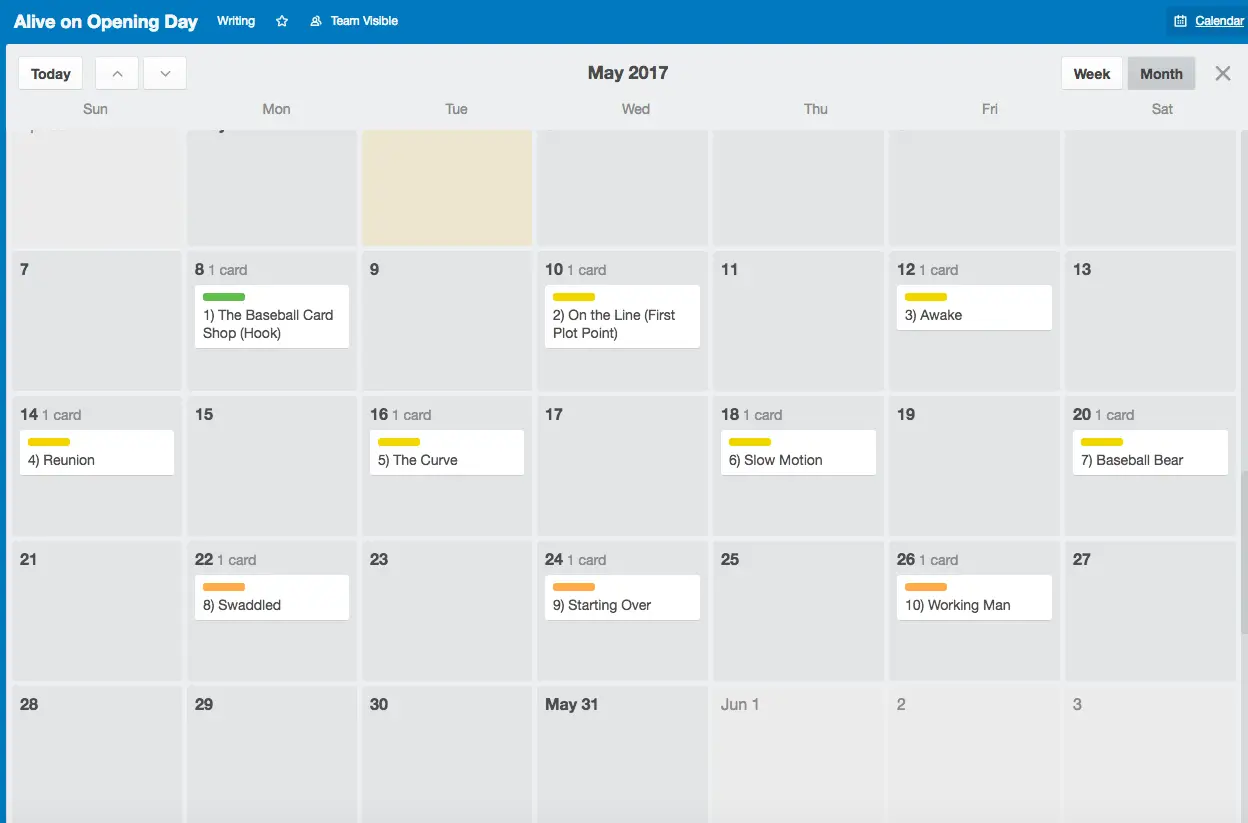
Finally, you can get a handy calendar view as a Power-Up. To activate that feature, click Power-Ups on the board menu:
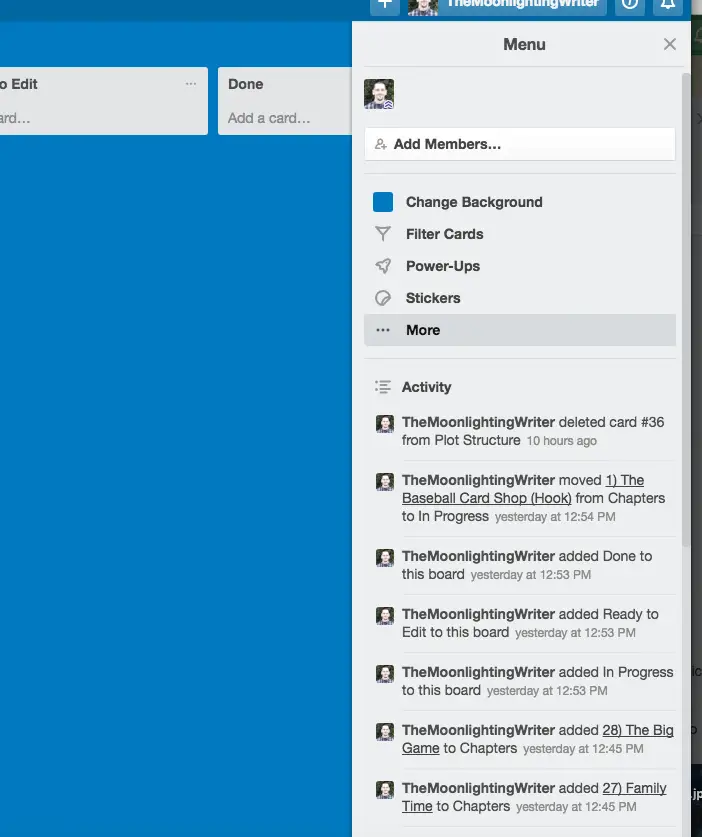
Then enable the Calendar option:

Once you’ve done this, you’ll see a Calendar link toward the upper right of your board:
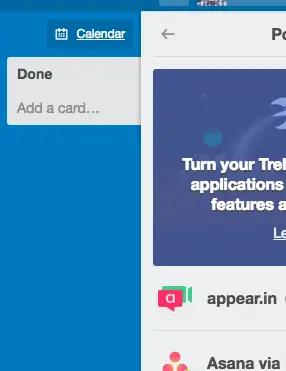
Click the Calendar link and you’ll see — TA-DA! — a calendar with all your due dates and tasks:
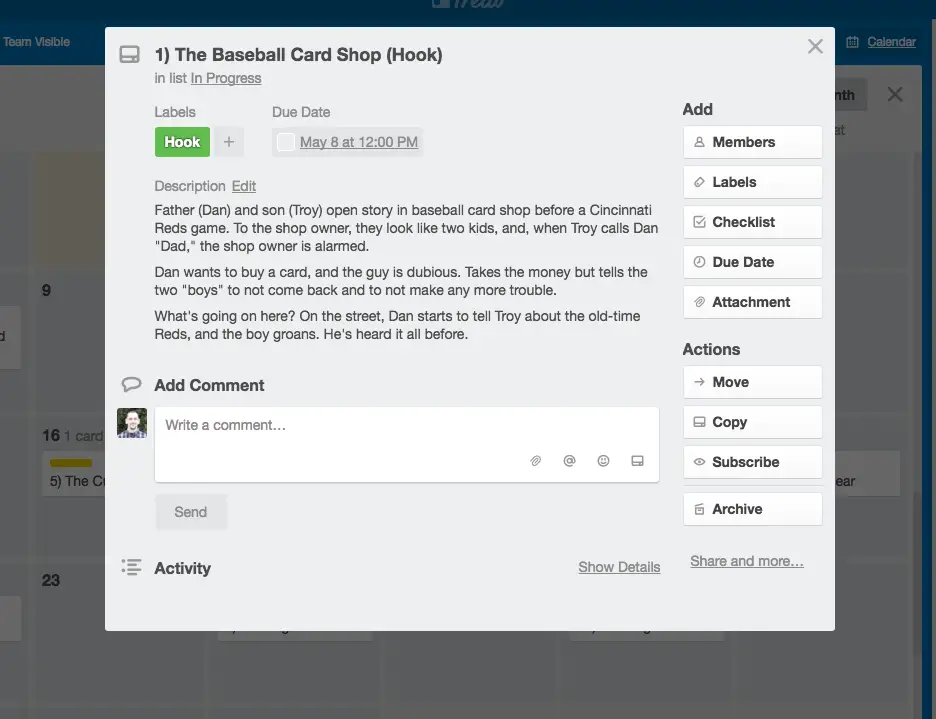
Clicking on any calendar entry will take you to the associated card:
Your Turn!
If you have been waiting for the “right time” to write your novel, you can stop waiting. There will never be a perfect period in your life for creativity — you just have to force the issue sometimes.
And if you have stopped and started your novel time and time again, then you’re probably working without a plan.
Failing to plan your writing is the single biggest obstacle to getting it done.
But it doesn’t have to be that way.
You can build a plan that will guide you from that first empty page to a finished manuscript, and won’t take that long to do it if you follow the process I outlined here.
And the really cool thing is that you don’t have to use this exact process. There are no rules to building a novel planner.
Use a different story structure if you like.
Stop once you’ve outlined your story parts.
Or dig deeper than I have here and subdivide your chapters.
Be flexible and make a plan that works for you, one that you can and will follow.
No matter how you choose to lay out your story plan, though, Trello can help you do it.
You may not use Trello for all your novel plans, but it’s a great place to start and will take you much further down the road toward a completed book than you’ll ever get by pantsing alone.
[/et_pb_text][et_pb_text admin_label=”Butt-In Seat Inline Opt-In” background_layout=”light” text_orientation=”left” use_border_color=”off” border_color=”#ffffff” border_style=”solid” saved_tabs=”all”]
[et_bloom_inline optin_id=”optin_12″]
[/et_pb_text][/et_pb_column][/et_pb_row][/et_pb_section]
